Sitting for meditation is not about achieving a museum-perfect pose. It’s about creating a relationship with your body that reliably supports awareness. The aim is awake ease: a posture that invites breath, steadies attention, and remains kind to joints, muscles, and nerves. These principles are options—not rules. Bodies change. Circumstances change. The posture that serves you beautifully one day may need a small, compassionate change the next. That responsiveness is the practice.
The most important “alignment” is invisible: your inner posture—dignity, sincerity, gentleness, and intention. If those qualities are present, the outer shape will naturally trend toward what is balanced and sustainable for you.
Inner Posture First
Think of dignity as a quiet “yes” to being here. Dignity is not a stiff spine or a rigid jaw; it’s a sense of self-respect in how you meet the moment. Sincerity means you don’t pretend the body feels different than it does—you work with what’s true. Gentleness keeps you from chasing idealized shapes at the expense of comfort. Intention is the thread that ties it together: Why am I sitting? What do I want this practice to cultivate? If you keep these inner cues in your awareness, the outer posture becomes less about performance and more about presence.
Universal Principles (for any seated posture)
Foundation. Begin from the ground up. Whether your base is feet on the floor, shins and knees, or the triangle of sit bones and thighs on a cushion, you’re looking for stable, even contact. If the base wobbles or collapses, the rest of your structure will compensate with gripping somewhere higher up—usually the neck or jaw. Stability at the base lets everything above do less work.
Natural curves. Your spine already knows how to lengthen. It has three curves—cervical (neck), thoracic (ribcage), lumbar (lower back). Good alignment does not erase those curves; it supports them. When we “stand up straight” by forcing the chest up and the shoulders back, we often over-arch the lower back and compress the ribs, which paradoxically makes breathing harder. Think of gently stacking the curves rather than straightening the spine.
Breath space. Your posture should permit the ribs to move in 360°—front, sides, and especially the back. If the breath feels trapped in the upper chest or you can’t feel the back ribs widening on inhalation, you likely need more height under your hips (floor sitting) or a more neutral pelvis (chair or bench). Breath is your best biofeedback for alignment.
Head–neck balance. The head is heavy. If it migrates forward by even a few centimeters, the neck and upper back must brace to keep it from falling further. Imagine a string from the crown lifting slightly, while the chin stays neutral (neither lifted nor tucked excessively). You’re aiming for a floating head—not a clenched neck.
Ease + alertness. Collapse leads to dullness; bracing leads to agitation. The sweet spot is a soft, tall posture—muscles doing just enough, breath unforced, attention steady. If you find yourself dozing, invite a trace more lift and light. If you find yourself tense, invite a trace more softness and weight.
Responsiveness. Micro-adjustments are intelligent, not failures. Every few minutes, let the body update itself: a millimeter of pelvic tilt, a wider collarbone, a softened jaw. Think of alignment as a living conversation, not a pose to hold at all costs.
Chair-Seated Meditation (in depth)
Why a chair can be an excellent choice. A chair is not a compromise; it’s often the most anatomically kind option. If hips, knees, or ankles complain in floor postures—or if you’re newer to sitting—chair practice allows you to focus on attention and breath without battling joint strain.
Seat height and relationship to knees. Ideally, your hips are at or slightly higher than your knees. If hips sit lower, your lower back tends to roll under (posterior pelvic tilt), rounding the spine and collapsing the chest. A firm cushion on the seat can raise you a few centimeters; the difference in comfort can be dramatic. This small change often frees the breath and reduces neck fatigue later in the sit.
Feet and foot support. Both feet should make confident contact with the floor. If they don’t reach, don’t dangle—use a folded blanket, a yoga block, or a sturdy book as a platform. Notice how stable feet calm the entire system: the body takes the message “we are grounded” and reduces unnecessary holding.
Two valid chair options.
• Front-edge sit: Sit on the front third of the seat so the spine self-supports. This encourages an awake pelvis and active length through the crown.
• Back-supported sit: Sit back with a modest lumbar roll (a small cushion or rolled towel at the low back). This lets you rest without collapsing the natural curve. Use this if fatigue or pain builds when unsupported.
Arms, hands, and the shoulder complex. Over-reaching hands toward knees or thighs pulls the shoulders forward and down into tension. Let the elbows hang closer to the waist and support the forearms if needed (a small pillow or folded blanket in the lap works well). A supported shoulder girdle means less neck strain and more relaxed breathing.
Common patterns and what to try.
• The slow slump. If you notice your chest sinking, first increase seat height by 1–3 cm. Then, imagine the breastbone floating slightly up and back—not up and forward—so the back ribs stay broad.
• Restless lower legs. Widen the distance between feet a little, or angle toes out slightly. Sometimes the ankles want a new angle to feel “done.”
• Tight jaw/temples. Let the tongue rest on the upper palate, lips unclenched, and soften your gaze. A longer, quiet exhale (without forcing) often melts face tension.
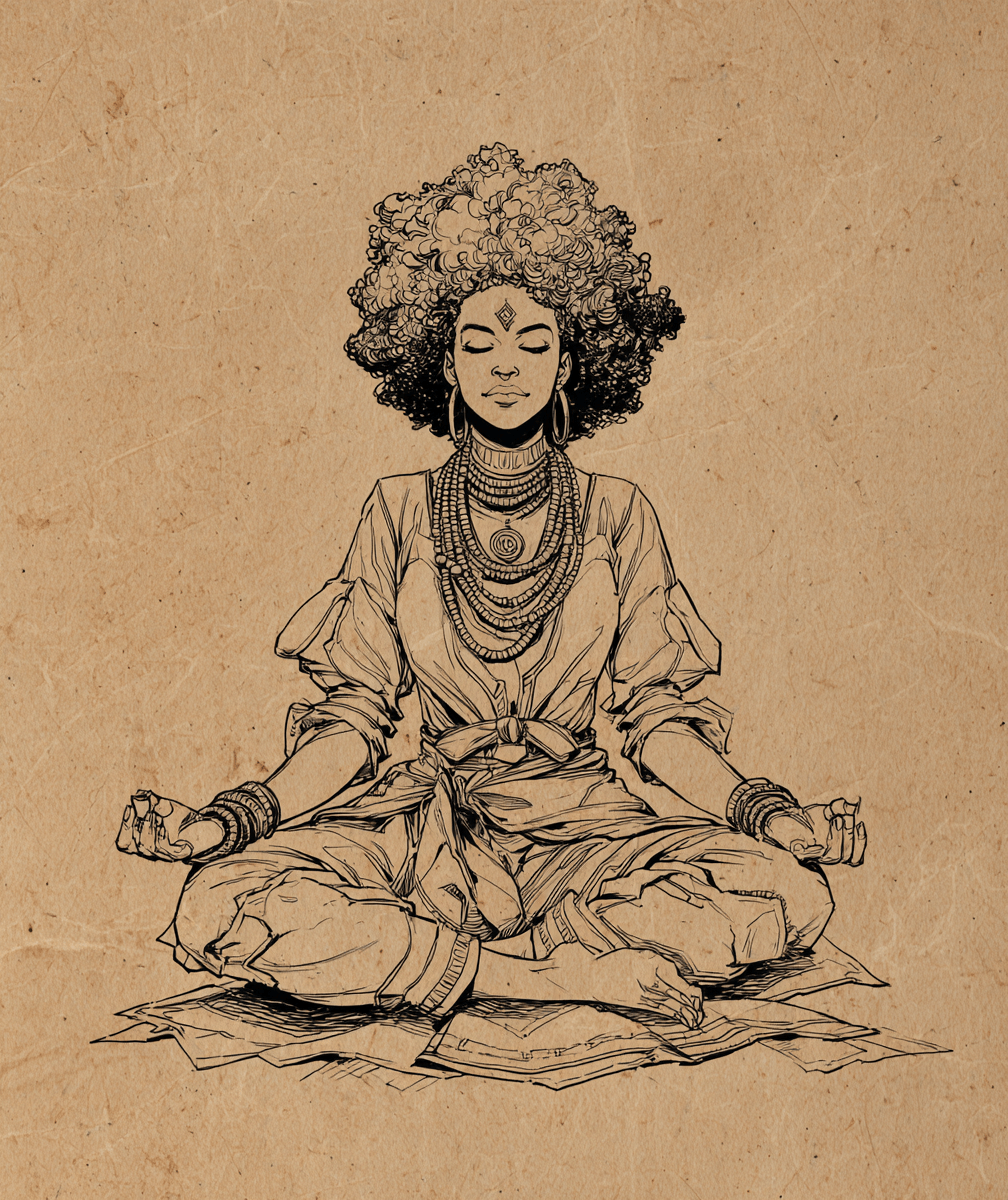
Floor-Seated (cross-legged) Meditation (in depth)
Why height matters. When sitting cross-legged, elevating the pelvis is almost always helpful. Sitting on the front third of a firm cushion (zafu/bolster) introduces a gentle anterior pelvic tilt, which preserves the natural lumbar curve and opens space for the diaphragm to move. Too low = the pelvis tucks, the low back rounds, the chest collapses, and breath gets shallow.
The knee-to-hip relationship. Your knees should be at or below the level of the hip crease. If your knees are floating higher than the hips, your body will recruit back muscles and hip flexors to hold the position—fatiguing and distracting. Add height under your seat until the knees relax downward. If knees still hover, support them with folded blankets or blocks so the thighs can let go.
Leg configurations and rotation.
• Simple cross-legged is almost always sufficient.
• Half-lotus is optional and only if pain-free—never force external rotation at the hip.
• Change the cross regularly session to session to keep the pelvis balanced over time.
Upper body organization. Think wide collarbones and a floating sternum—lightly lifted but not flared forward. Let the shoulder blades settle down and out, creating a sense of width across the back. This width is what gives the lungs their room.
Low-back support without rigidity. The lower back should feel supported by the pelvis, not held rigid by the erector spinae muscles. If you feel a steel-rod effort, you’re probably arching. Let the belly soften a little and think “tall from soft.”
Common patterns and what to try.
• Knee strain or pinching. Raise the seat and prop the knees. If pinching persists, adjust the angle of the shins (wider stance) or switch to a kneeling bench or chair that day.
• Numb feet. This is usually compression or circulation. Change the cross, subtly alter ankle angle, or briefly extend the legs between sits. If it continues, try a different posture the next day—this is not a grit test.
• Persistent low-back ache. Increase height under the pelvis. If you’re already high, try a kneeling bench—some bodies prefer the shin support of seiza.
Kneeling (seiza) Meditation (in depth)
Why seiza can be a relief. For many people with hip restrictions or sensitive low backs, kneeling distributes forces in a way that allows the spine to stack with minimal effort. A small meditation bench or a firm cushion between calves and sit bones is the key.
Knee and ankle considerations. Place a folded blanket under shins and knees so there’s no sharp pressure. If your ankles feel compressed, add padding beneath them or choose a higher bench. If you have knee concerns, keep sits shorter and alternate with a chair.
Pelvis and ribcage. As in other postures, you’re after a neutral pelvis and a broad, buoyant ribcage. With the bench height set correctly, the low back can retain its natural curve without bracing. A subtle, low-effort engagement through the lower abdomen (think “tone, not tension”) can help you feel long without stiffening.
Common patterns and what to try.
• Ankle discomfort. Pad more generously or experiment with a slightly different bench height.
• Knee pressure. Widen the knees a touch to decrease compression; ensure padding is under the kneecaps, not behind them.
• Upper-body sway. Soften the ribs and imagine the head balancing like a bowl of water you don’t want to spill.
The Upper Body: Shoulders, Ribcage, Head, and Hands
Shoulders and scapulae. Many of us carry the “shoulders down and back” cue too far, which pinches the shoulder blades together and narrows the back ribs. Instead, imagine the scapulae melting down and slightly wider, creating a broad back and relaxed chest. The feeling is open but unforced.
Ribcage and breath mechanics. A healthy meditation breath is not a theatrical belly balloon. It is a quiet, even expansion that you can sense in the side and back ribs as much as the front. If you can’t feel any movement in the back ribs, your posture likely needs adjustment: add height (floor), elevate hips relative to knees (chair), or soften a lifted chest (all postures).
Head, jaw, tongue, eyes. Let the jaw unclench and the tongue rest softly on the upper palate. Eyes can be gently closed or softly open. If you tend to get drowsy, keep the eyes half-open with a lowered gaze 1–2 meters ahead. If you feel overstimulated, closed eyes may reduce input enough to settle the system. Neither option is “better”; both are tools.
Hands and forearm support. Hands can rest palms down (grounding) or palms up (receptive). If your shoulders creep up or your neck tightens, it means the arms are hanging and pulling on the shoulder girdle. Place a small cushion or folded blanket in your lap to support the forearms. Suddenly the neck will feel two sizes larger.
Discomfort vs. Pain: Learning to Listen
Meditation often asks unfamiliar muscles to work a little; mild sensation is normal. Pain is not an initiation rite. Learn the difference:
- Expected sensations: a gentle stretch across hips, a subtle work in spinal stabilizers, a mild warmth in the ankles or knees that eases as you settle.
- Red flags: sharp or escalating joint pain, burning or tingling that spreads, numbness that doesn’t resolve with a small change, or pain that radiates.
At the first hint of a red flag, change your position. Add height, support a knee, re-stack the pelvis, or switch to a different posture entirely. There is no merit badge for pushing through. You’re teaching your nervous system that your awareness is trustworthy; honoring signals is essential to that trust.
Accessibility and Special Considerations
Pregnancy. Prioritize space for breath and circulation. Elevate the hips (floor) or use a supportive chair. Avoid long holds that create numbness in the legs. Side-lying restorative rests between sits are welcome.
Knee/hip/ankle history. Choose chair or bench first; avoid deep knee flexion or forced external rotation. Prop generously. Pain now steals attention later.
Low-back sensitivity. Higher seat, more anterior tilt, and sometimes back support are your friends. Alternate postures across days to vary tissue loads.
Hypermobility. The goal is stability, not range. Avoid collapsing at end ranges; use props to create contact and feedback. A little midline tone helps you feel “contained” without stiffness.
Larger bodies. Use wider bases and higher bolsters. Let leg angles be more open. Comfort is not indulgence—it’s intelligent design.
Circulation or neuropathy concerns. Sit for shorter intervals. Reset more often. Keep the lower body warm; warmth reduces guarding and improves comfort.
Working With the Breath (without forcing)
Begin by noticing your natural breath. If it’s shallow, that’s useful information; don’t fix it—free it by adjusting posture to give the ribs room. When you’re ready to shape the breath gently, a longer exhale often down-regulates arousal (e.g., inhale for about 4, exhale for about 6, all through the nose). If shaping the breath creates strain, return to natural breathing and adjust your posture instead. Breath follows space.
Micro-Adjustments: Keeping the Posture Alive
Every five to ten minutes, let yourself make one tiny change:
- A millimeter of pelvic tilt forward or back to rediscover neutral.
- A soft widening across the collarbones or a jaw release (feel the teeth un-touch).
- A micro-nod to balance the head again over the spine.
Pair the adjustment with one aware breath, then continue. This rhythm prevents over-gripping and keeps the practice clear rather than heroic.
Before and After: Short Sequences That Help
Before you sit (1–2 minutes):
- A few seated cat–cow movements to wake the spine.
- Shoulder rolls forward and back to melt tension.
- Tiny neck nods (yes/no) to relax the suboccipitals.
- Three quiet nasal breaths, feeling the back ribs open.
After you sit (1–2 minutes):
- Ankle circles or gentle leg shake-out to restore circulation.
- A soft seated twist to rinse the ribs.
- Stand and reach overhead, then a loose forward fold with bent knees.
- One long exhale. Notice how the body feels after stillness.
Common Pitfalls and Kind Corrections
Over-efforting. You look “perfect,” but you’re exhausted five minutes in. The fix: soften the belly a little; let the sternum float rather than lift; lower the elbows; lengthen the exhale.
Under-support. You’re collapsing and chasing breath. The fix: add height (floor), add lumbar support (chair), support knees/forearms, and widen the base a touch.
Chasing stillness. You’re policing every twitch. The fix: allow micro-movement; invite a posture that breathes. Stillness arises from comfort, not willpower.
Self-judgment. You’re narrating failure. The fix: name it—“judging is here”—then return to intention and one felt anchor (sit bones, palms, or breath at the nostrils). The willingness to begin again is your strength.
Quick Self-Checks (useful during practice)
Foundation (30s): Are my feet/shins/sit bones clearly supported? Are my hips at or above the level of my knees? Do I feel grounded?
Spine & Breath (20s): Do I sense natural curves? Can my ribs move freely, especially in the back? Is my head floating rather than craning?
Comfort (10s): Any sharpness, spreading numbness, or escalating tension? If yes—adjust now.
Try This Now (2-Minute Guided Setup)
Choose chair, floor, or bench.
- Feel the base—feet, shins, or sit bones—settling into support.
- Let the spine stack from pelvis to crown, curves present.
- Widen the collarbones and let the shoulder blades ease down and out.
- Soften jaw, tongue, and eyes; choose closed or lowered gaze.
- Invite the breath to expand low, wide, and back—no forcing.
- Make one tiny adjustment that increases ease by 2%.
- Take six natural breaths. Notice one place that softened and one that feels quietly awake. Begin.
FAQ (practical answers)
How long should I sit? Start with 5–10 minutes and add slowly. What matters most is consistency—regular, humane practice builds capacity.
My legs fall asleep. Increase seat height, support your knees, and change the cross regularly. If numbness persists, alternate with chair or bench sits. Circulation is not a test of will.
My back hurts. Raise the pelvis (floor), add lumbar support (chair), shorten the sit, or switch posture. Pain is a message—respond early.
Eyes open or closed? Use what supports alert ease today. If sleepy, keep a soft, lowered gaze. If overstimulated, close the eyes lightly and anchor in the body.
Can I lie down? Yes, especially for pain or fatigue. Use props under knees and head to maintain comfort and wakeful presence.
